

GIFS are cool and so can you.
GIFs have become my favorite way to incorporate little video bites into my Instagram feed. As a photographer, I had to get creative in ways to recycle my photos into fun, new content for my audience. GIFs are fun for ANY type of photographer to create, and they’re also super easy to make once you get the hang of it. I make GIFs for my engagement sessions, for wedding photography clients, restaurant clients, and branding photography clients alike. If I can make them, you can make them too!
Check out the step by step instructions below and follow along with the video tutorial I’ve recorded, and you’ll be making GIFs in no time!
Making a GIF using Photoshop
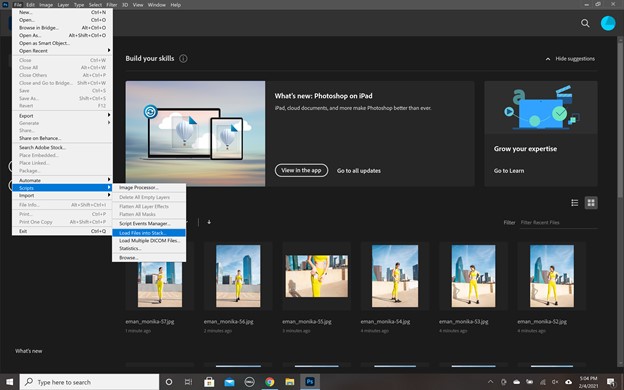
1. Upload your images to Photoshop. (Open Photoshop and go to File > Scripts > Load Files into Stack. Browse to find your photos and hit OK when you’re done).
*Note: you want to make sure that the sequence of photos you are working with have been shot at the same distance and are all the exact same dimensions. Otherwise, your GIF will end up looking a little clunky.
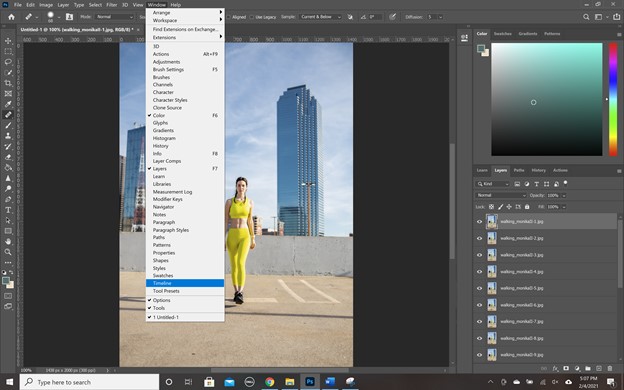
2. Click on the Layers panel to see all your imported photos as individual layers. These will become the individual frames of your GIF! Then, open up the Timeline window. If you’re not seeing the Timeline window at the bottom of your screen, just go to Window in the menu bar and check off “Timeline” and it’ll pop up.
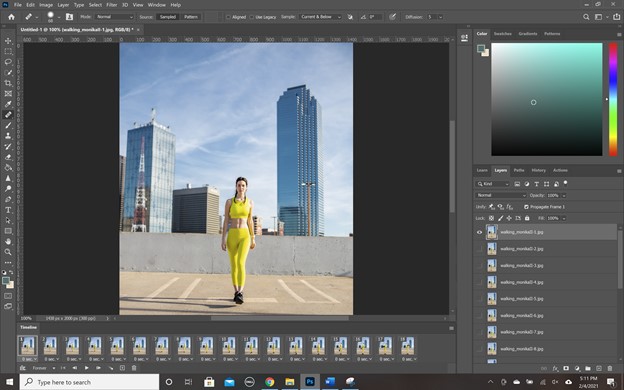
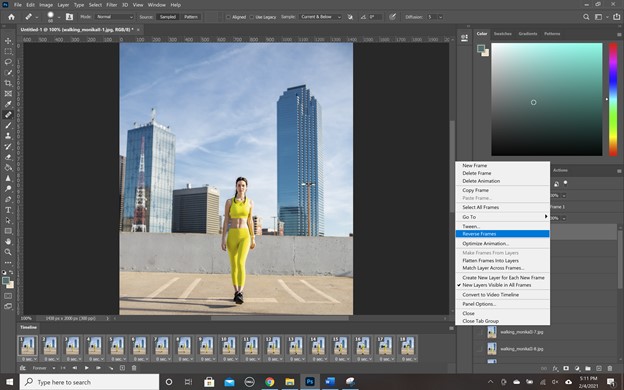
3. In the Timeline window, click the “Create Frame Animation” button. Then, click the menu icon from the upper right corner of the Timeline panel. Click “Make Frames From Layers.”

4. Under each frame you’ll see the number of seconds each frame lasts for. Select how long it should appear for before switching to the next frame. I like to use 0.1 seconds, but it’s totally up to you how slow or fast you want your GIF to be.
*Note: if your frames are reversed, just select all frames and click on that same little menu icon as before and hit “Reverse Frames”.
5. At the bottom of the toolbar, select how many times you’d like it to loop. I like to make mine loop around 5 times for a good video length.

6. (You can preview your GIF by pressing the Play button).
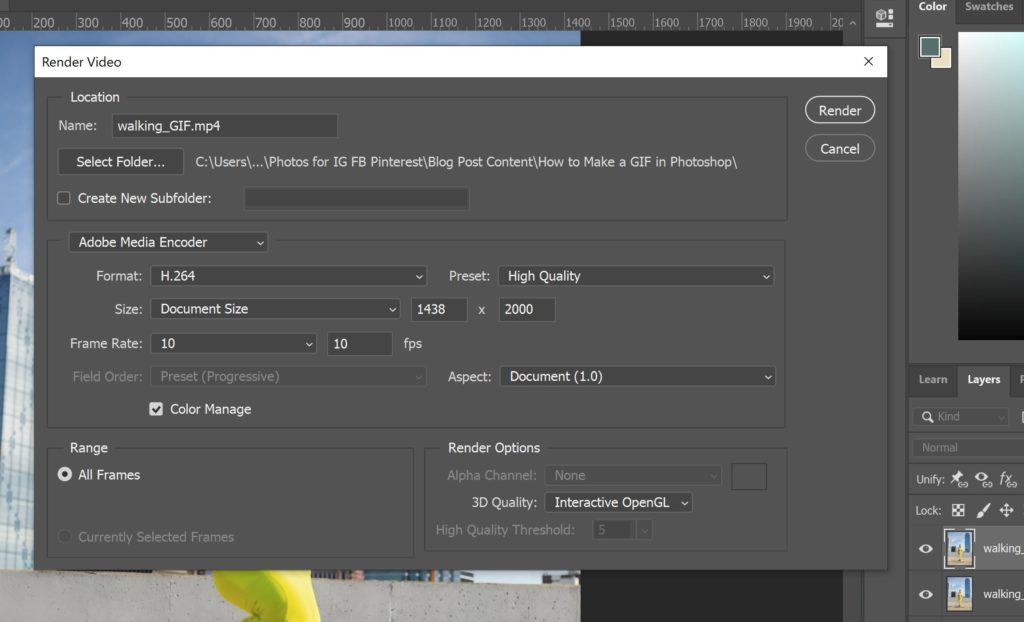
7. Now it’s time to save and export your GIF. You can export as a GIF, but I like to hit Export > Render Video and save as an mp4 so I can easily upload to Instagram. Make sure your frame rate matches what you’ve chosen in step 4 as your video speed. Also make sure that the file size you’re exporting at matches the same dimensions as the images you’ve imported to create the GIF. (Example: 1800×1200 pixels is what I often use).
8. That’s it! Written instructions are great, but I know I learned most of my editing tricks as a photographer from watching other people, so I recorded a little video for you below.
Watch my video below for a step by step walkthrough of how to make a GIF using Photoshop: